Do YOU Know How to Jump-Start Your Car?
cars, Ford, Ford Service, jump start, Maintenance, Service, SUV, TRUCKS
We’re back at it again with another dose of “not so” common sense tips that can help you out, in the event you need to jump your Ford car, truck or SUV.
-
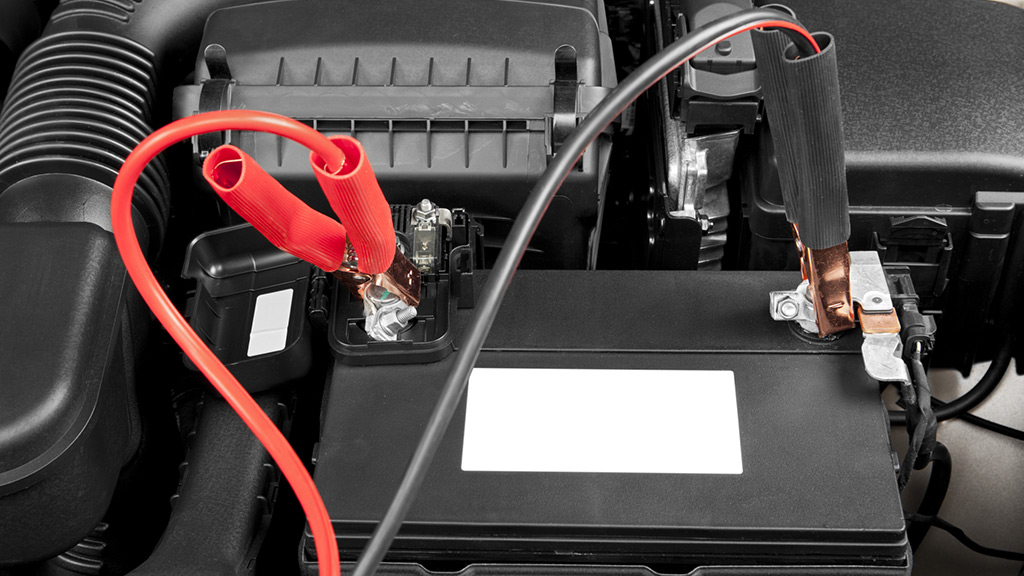
- *1. Locate the battery in each car. Before you get started, find the battery in both your car (i.e., the “disabled” one) and the one you will use for the jump (the “source” car). The battery is usually under the hood, but in some cars it is in the rear of the car or even under a seat. This location will affect the way you position the cars.
-
- 2. Identify which post is positive and which is negative on each battery. IMPORTANT: A post may have a red cap or red tape on it, but that doesn’t always mean it’s positive. There is almost always a raised plastic symbol on the battery housing to mark “+” or “-“ near the battery post.
-
- 3. Start the source car and position it so that the jumper cable will reach both batteries without being pulled taut. Leave that car running.
-
- 4. Put on safety glasses. The car’s fan can blow debris in your face when the engine starts up after a jump. Or a spark could lead to an explosion (rare, but it does happen), spraying battery acid into your eyes. Don’t risk it—consider stashing a pair of safety glasses in your emergency kit, so you’ll be prepared.
-
- 5. Hook up the disabled car. First connect the positive cable to the positive post, then connect the negative cable to a “known good ground”—an automotive-industry term for an unpainted metal part of the car, such as the engine block. IMPORTANT: If you have a hybrid or an electric car, read your owner’s manual carefully before attempting a jump start. (Fusion Energi owners, read this. Focus Electric owners, read this.) The process of finding a good ground for these cars is different, and a small mistake in placement could cause an expensive problem.
-
- 6. Connect the source car. Again, do it in this order, to reduce the likelihood of sparks occurring: Attach the positive jumper cable to the positive battery post, then connect the negative cable to a known good ground—as far away from the battery as possible. (When a battery charges, a gas is released, and any sparks could cause an explosion.) Ensure that the jumper cables are not near any moving engine parts. Don’t move either of the cars while the jumper cables are attached.
-
- 7. Try to start the disabled car. If it starts, great! Skip down to step 10.
-
- 8. If the car doesn’t start, let it charge for a few minutes, with the source car running. Just leave everything connected and wait. As the car runs, its own battery becomes more charged, allowing it to have enough power to charge the disabled car. This may take as little as five minutes. If it starts now, jump to step 10.
-
- 9. If your car is still not starting after about five minutes—or if it starts, then dies again after a few seconds—call to have your car towed to a dealership. Some companies will deliver new batteries, but this may not be worth your time and money, because whenever a new battery is installed certain areas of your car should be examined (e.g., the battery cable ends, in case there’s corrosion, and the charging system, to determine why the battery went dead in the first place). So it’s a good idea to tow your car to a Ford dealership and have it checked properly. Also, the battery may be covered under warranty, and your Ford service advisor can check on your car’s warranty status. Call Ford Roadside Assistance at 800-241-3673.
- 10. Safely disconnect the two cars. Remove the cables in reverse order of installation: negative first, then positive on the source car. Then negative followed by positive on the car that received the jump.
Once you have completed these 10 easy steps, it’s a good idea to drive your car around for at least, 15 to 20 minutes to fully charge the battery.
Credit: myfordmag.com